Addendum, 3 September 2015: I did this project with a Wii Fit Trainer from the first amiibo run. I am led to understand that the reprints are better-constructed, and in particular the foot and the cast are glued much more securely to the stand. People who have executed this mod with the reprints have had to “club it straight off and mighty glue it,” albeit with gorgeous results. It’s still very much possible to execute this mod with your newer WFT amiibo, but you probably won’t have as easy a time as I did.
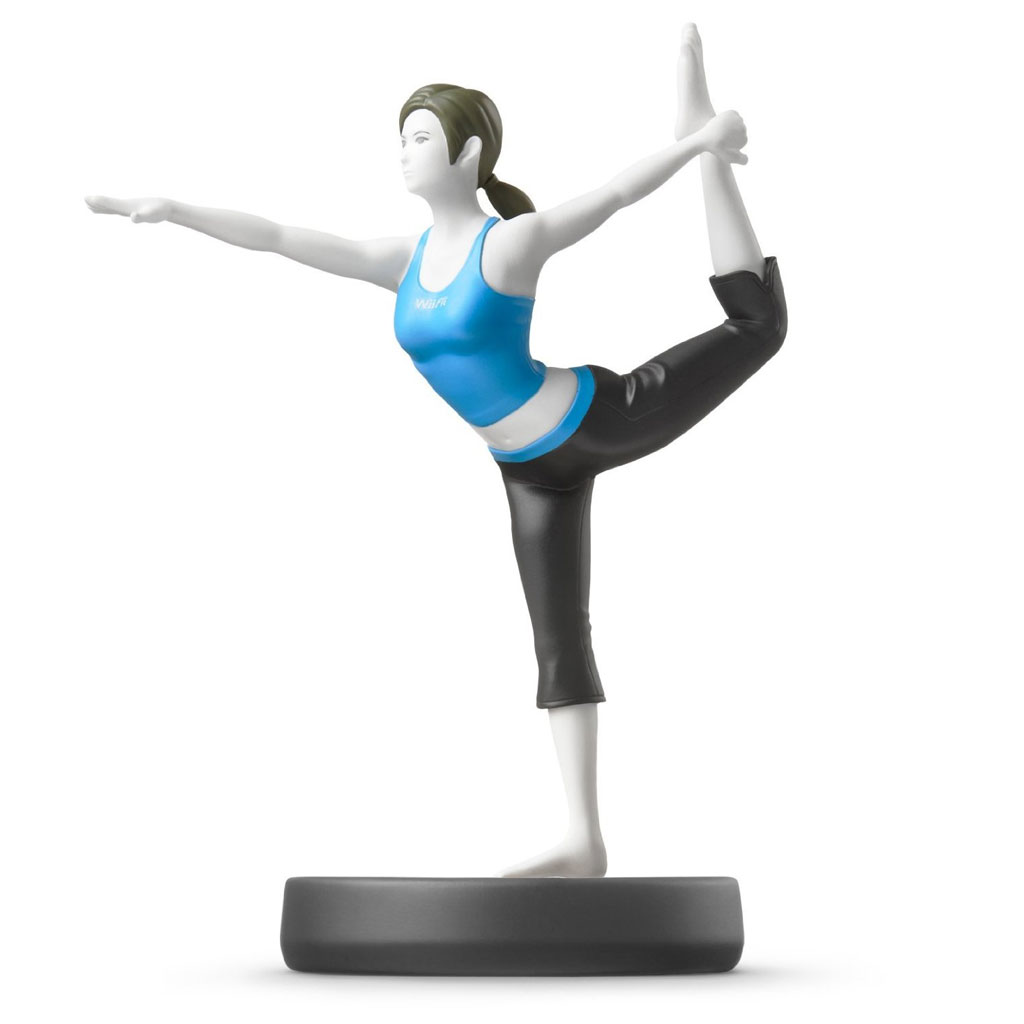 This is what the Wii Fit Trainer amiibo was supposed to look like.
(If you know where this is going, feel free to scroll to the bottom.)
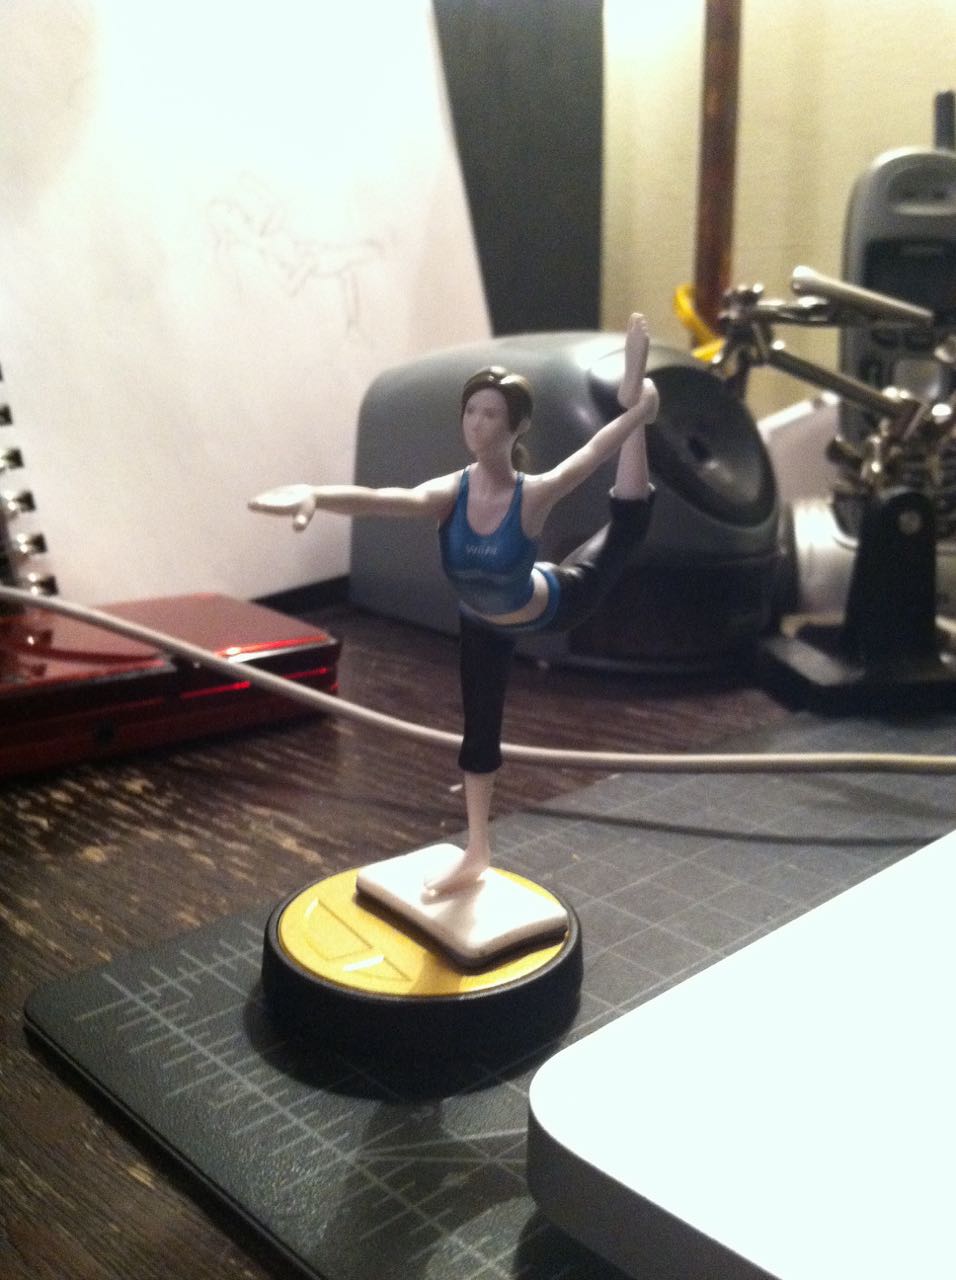
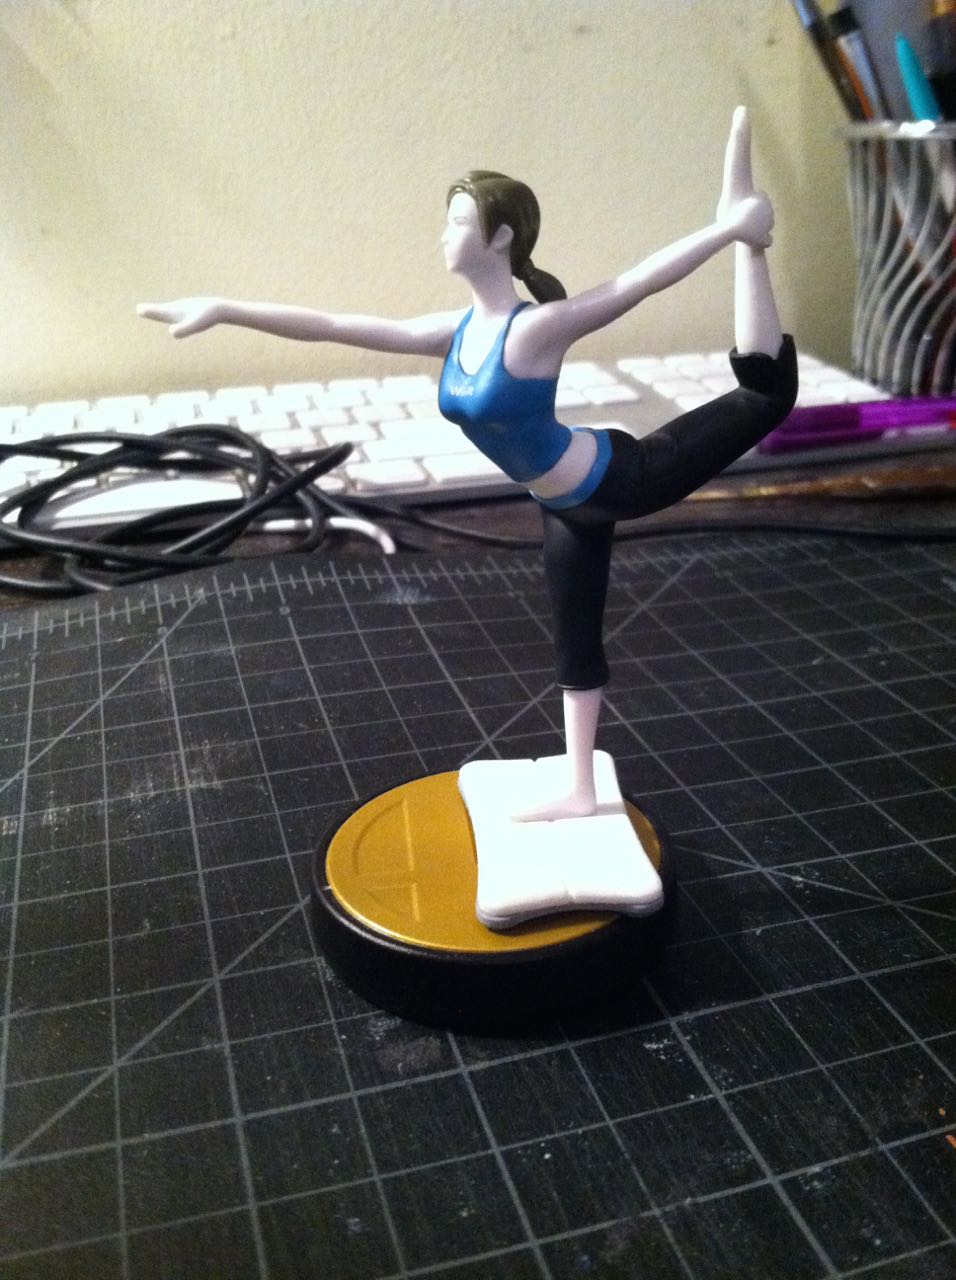
This is what the Wii Fit Trainer amiibo really looks like:
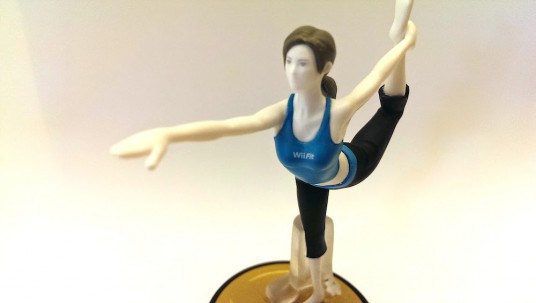 (Photo by Miguel Concepcion, stolen from here)
The big translucent cast around her leg that they added isn’t necessary to support her per se; the lady balances just fine, as you’d expect from a yoga expert. I believe it was added to defend her leg against being snapped apart at the ankle by rowdy kids. At any rate, it’s ugly.
Several other figurines in the amiibo line were subjected to similar treatment, but this one bugged me the most. I really love the Wii Fit series! The games haven’t done a great job of keeping me in shape, but they’re incredibly fun. The Island Cycling minigame in particular appeals to me on a deep level that is outside the scope of this essay. Let’s get back to the matter at hand.
Wii Fit Trainer and the rest of the first wave of amiibo weren’t released until November 21, but photos like the one above were available well before, and on November 5, on Twitter, this happened:
https://twitter.com/danbruno/status/530189109092827136
When the 21st rolled around and I received my figurine, I got to work real fast:
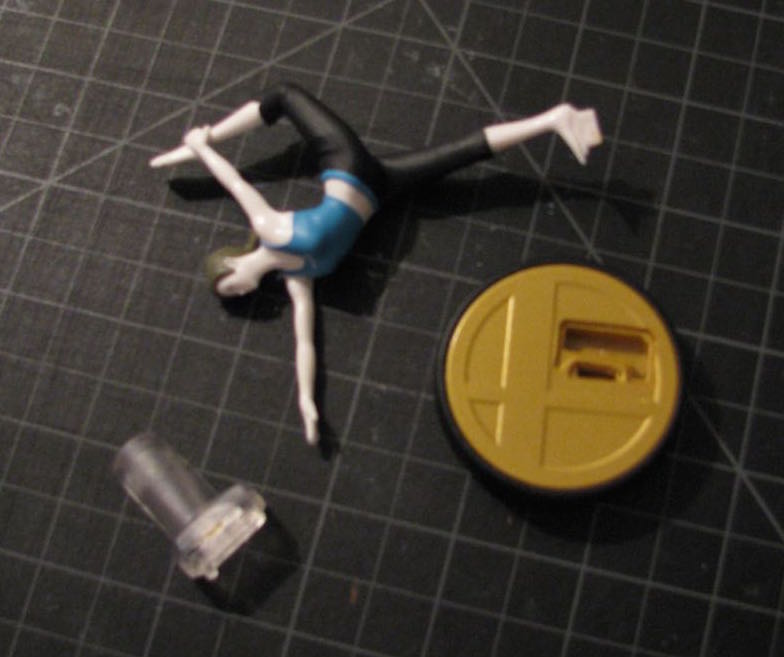 Disconnecting the various pieces was really easy: I just poked around in the crevices with a craft knife until they came loose. [Disassembling the reprinted WFT is much tougher!] I was fortunate that the cast was a separate piece; I had worried that I’d have to carve it off like I was extracting a fossil and then probably have to reshape her leg somehow. In fact, the cast wasn’t even glued to the leg; it just popped off and on like a Lego ball-and-socket. [I believe this part is still true of the reprints.]
After measuring my own Wii Balance Board with some help from Emily Boegheim, I made this model in Blender:
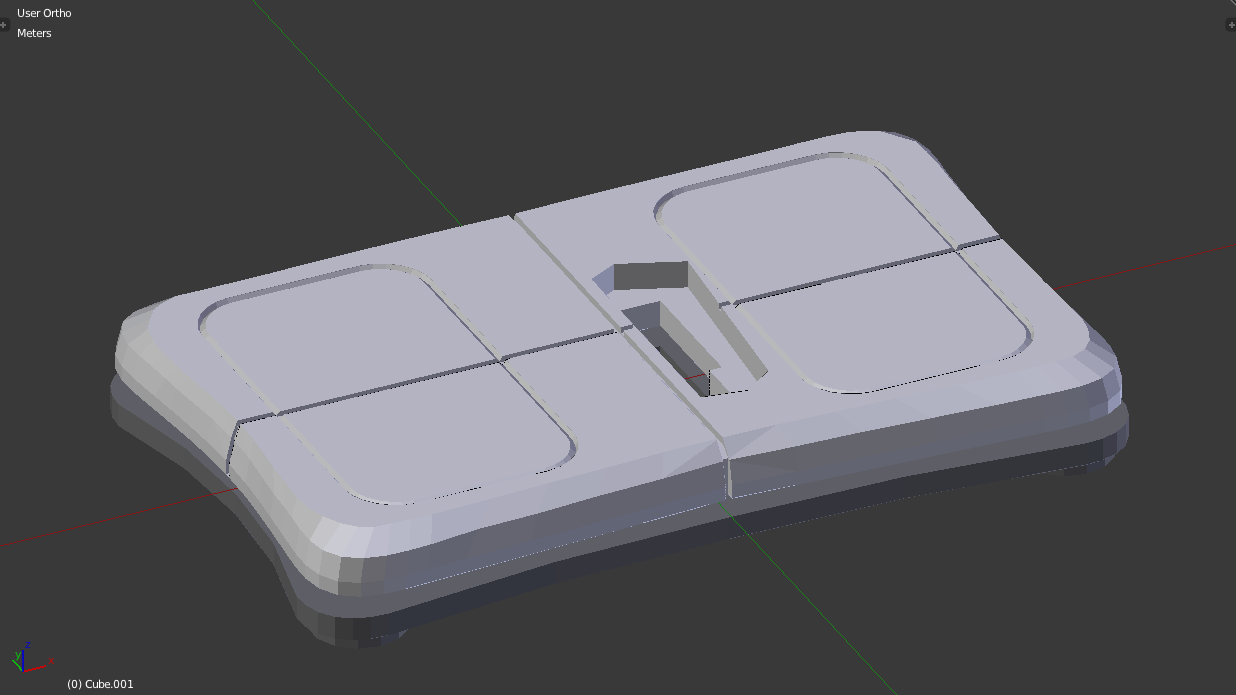 The major details are exaggerated quite a bit, because otherwise they wouldn’t be visible when printed at amiibo-size. (The Wii Fit Trainer figurine is approximately 1:16 scale.) Similarly, I didn’t include the power button and the debossed “Wii” insignia at all, because if I made them big enough to be visible then they would be too big to match the scale. The hole in the middle is (supposed to be) shaped just like the hole in the amiibo stand that contains the “ice skate” protruding from the figurine’s foot.
I submitted the model to Shapeways and ordered my prototype 3D-printed balance board on November 26. For mysterious reasons, I didn’t receive it until December 20th. When it finally arrived, I got right to work:
It doesn’t look bad at all in this blurry photo, but the model had a number of issues:
- The lines of detail on the top of the board were too thin to print correctly; I had to (try to) score them with my craft knife.
- I determined the size of the model by measuring the trainer’s feet in screenshots from Wii Fit. (Someone who walked in while I was making these calculations could have gotten the wrong idea.) The proportions of the board were very accurate, but it wasn’t big enough to completely cover the socket in the base where the cast used to be.
- The hole in the board for the lady’s “ice skate” was too narrow and shallow, and as a result her foot was protruding up from the board by about a sixteenth of an inch.
By the 22nd I had completed a new model: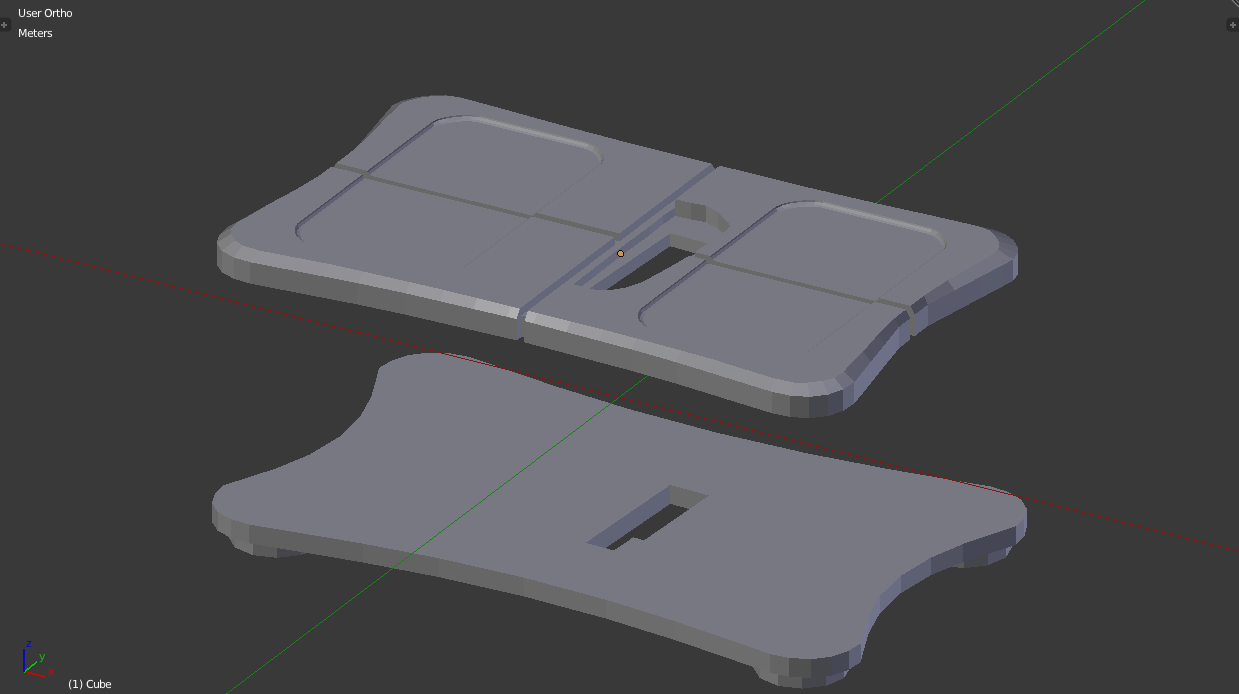 I ordered it right away, and it arrived today. I didn’t get a decent picture of the unassembled parts until after I painted the underside. (I don’t know anything about painting models and I don’t have anything to say about it here?)
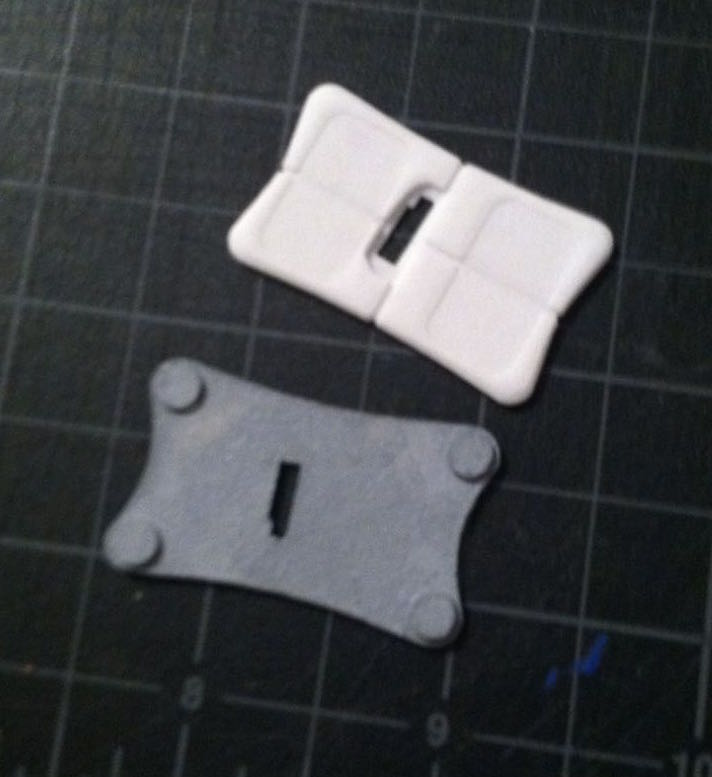 Here’s how my second pass handled the prototype’s problems:
- Where the lines of detail on the prototype were 0.2mm across and deep, on this one they were 0.5mm—The former is what Shapeways recommends as a minimum for visible details (so I guess they’re wrong about that?); the latter is the thickness they recommend for legible text. I don’t think that the new version’s lines are too thick, though.
- The second version’s measurements were based on the size of the sockets in the base that I wanted to cover. I thought the difference would be negligible, but the second version turned out to be a full quarter inch wider on its longest axis—about 120% of the meticulously-calculated to-scale size. This is unfortunate, but I’ll live with it.
- I was very careful not to make the ice skate-hole too small in the second version, so of course I ended up making it a little too big. This didn’t end up being much of a problem, though.
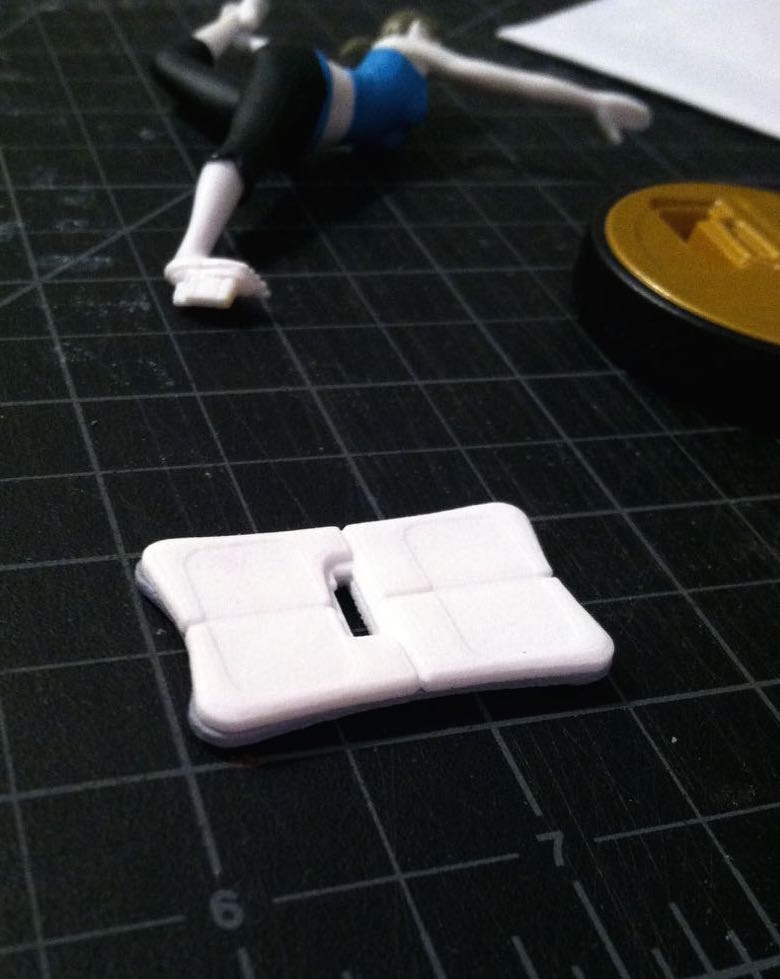
I glued the top and bottom of the board together:
 Then I glued the board to the base. I didn’t get a picture of that part.
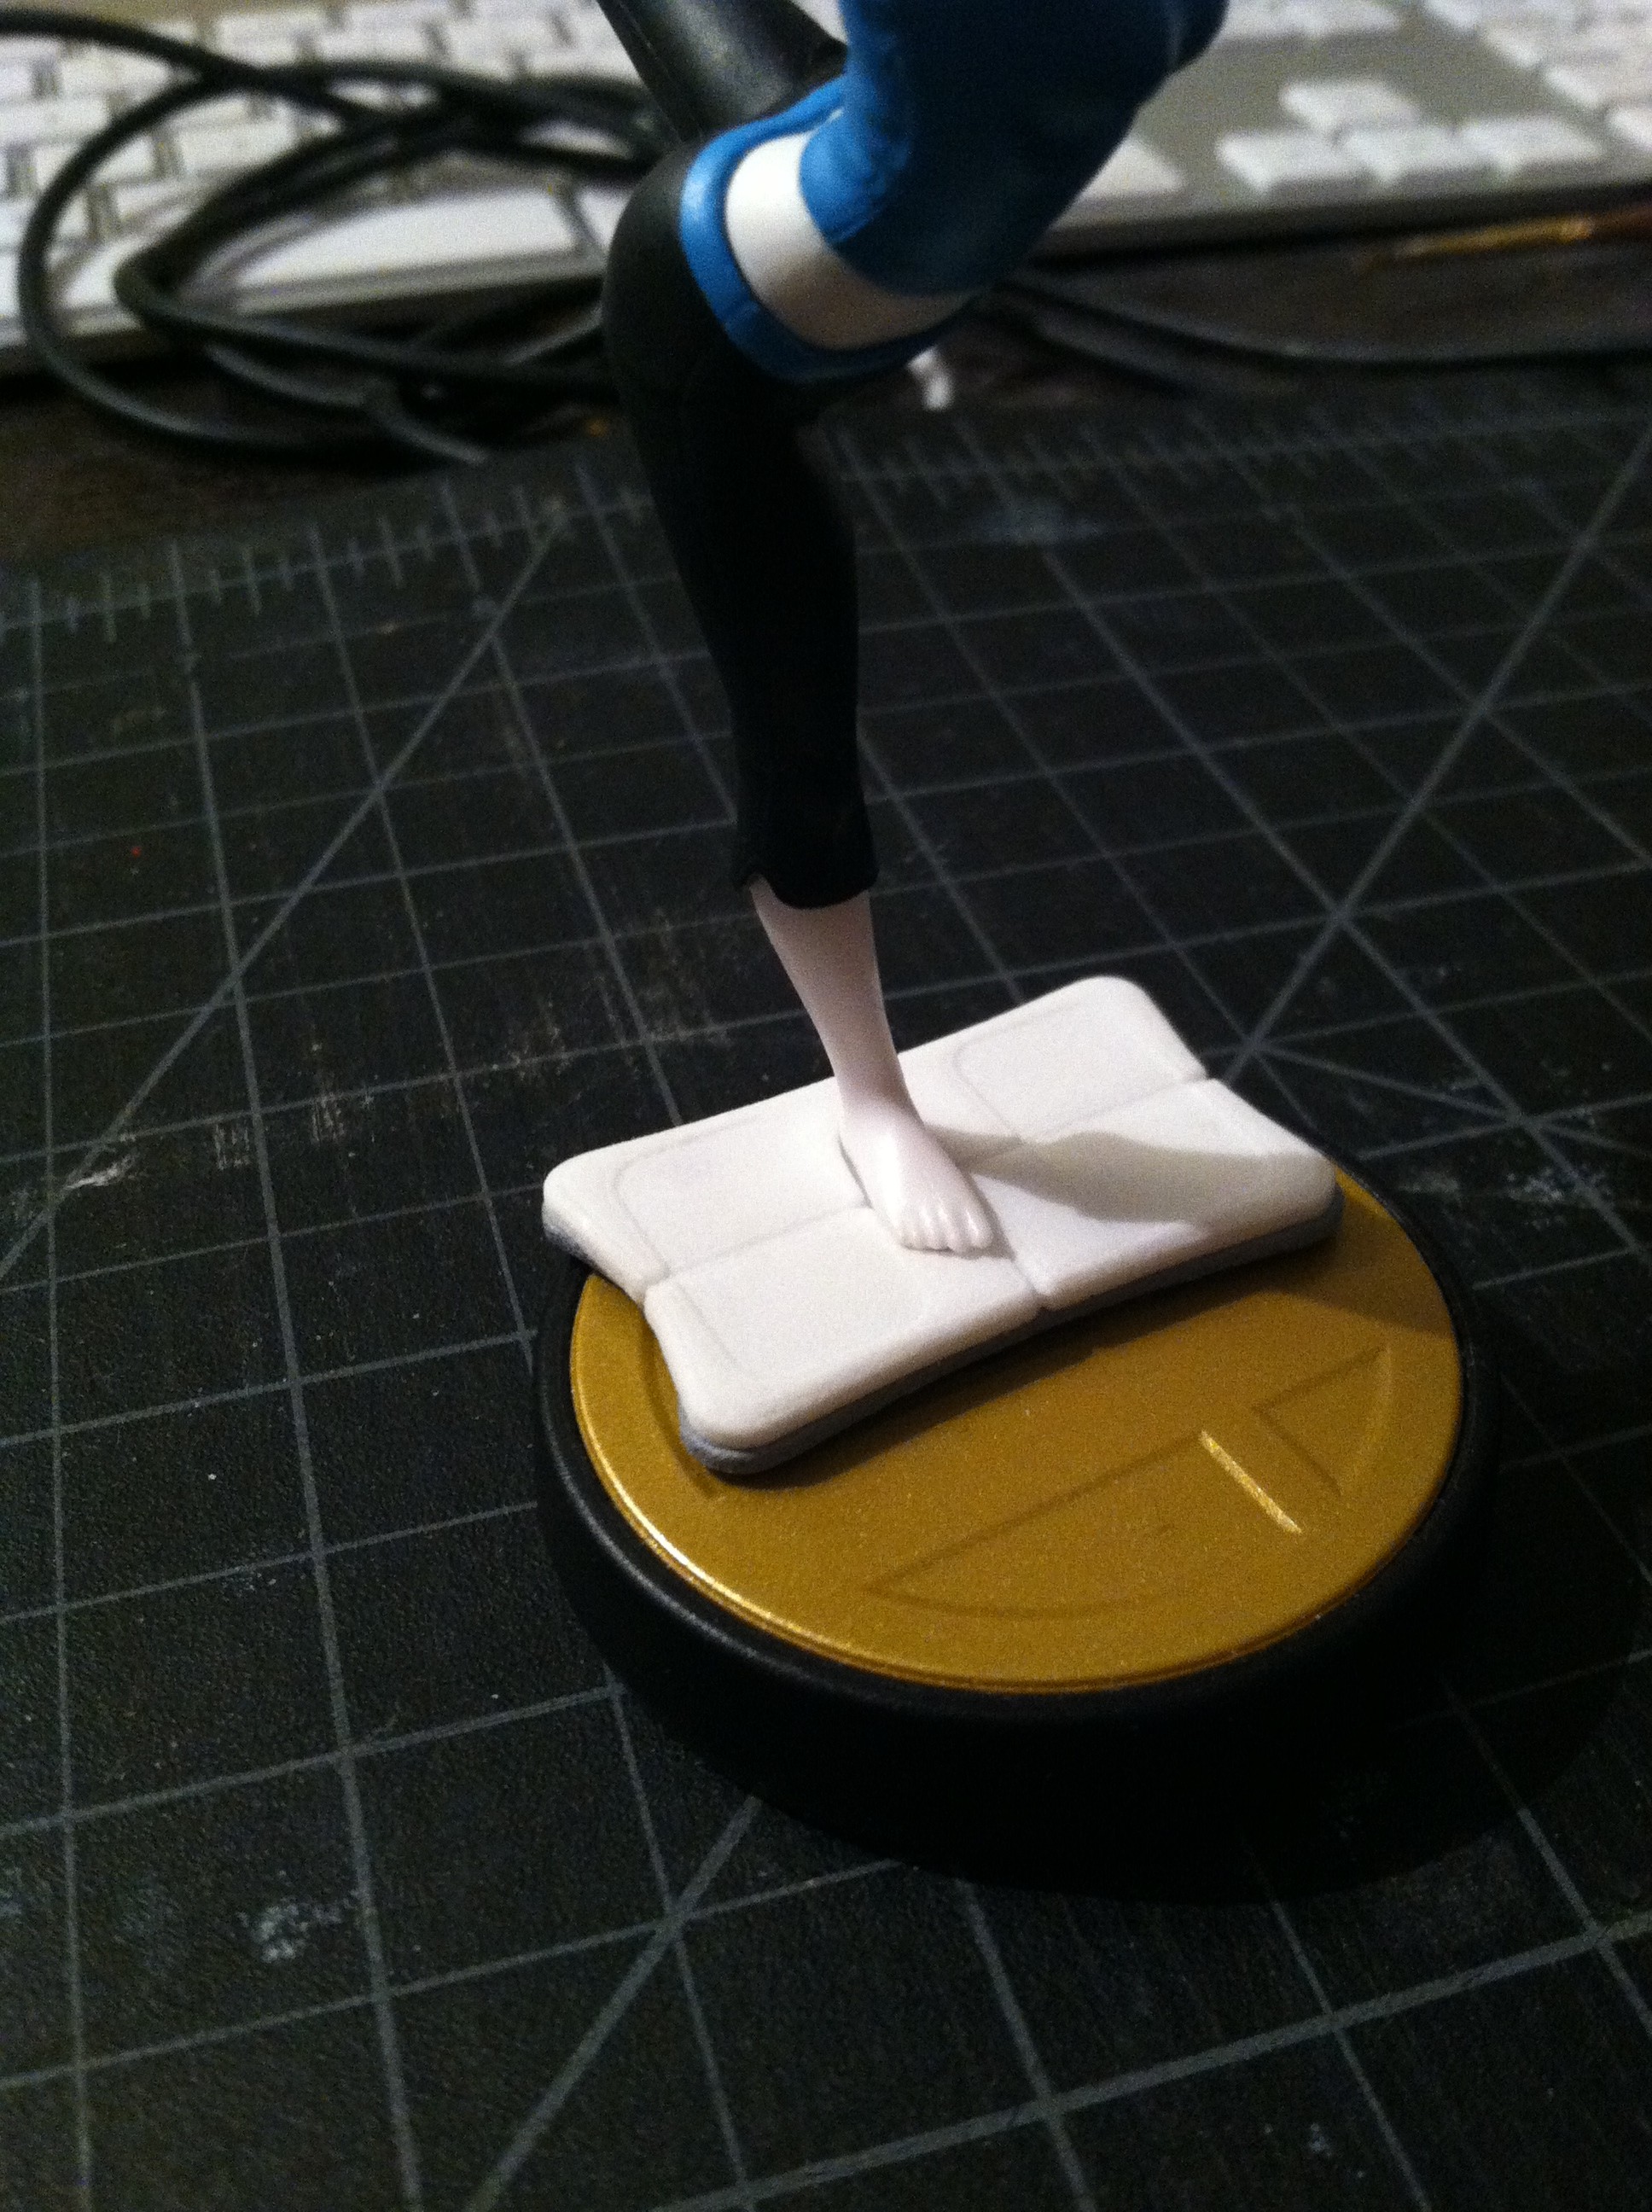
Then I glued the trainer into place!
The board fits her foot just fine; she isn’t floating or anything:
I’m very happy with it! This was my first experiment with 3D-printing something I modeled myself, and I’m excited to pursue more ambitious modeling projects in the future. Only one loose end remains: What should I do with that stupid ugly cast?

While I was working on this project, the Wii Fit Trainer amiibo became something of a collector’s item among collector’s items, and I understand they are not easy to find. I hope what I’ve done doesn’t offend the sensibilities of any amiibo purists. If you are lucky enough to have snagged a Wii Fit Trainer and you want to make the same modification, you can order your own copy of my Wii Balance Board model from Shapeways. The markup I have added to the Shapeways printing cost is one dollar.
Thank you for your interest.